Microsoft Windows operating system has evolved a lot in the past few years however every machine requires maintenance and so does your Windows PC. When we purchase a brand-new computer, we get thrilled with its ultimate performance however, whenever we use the computer, it accumulates a lot of clutter and the performance starts dipping down. We should regularly clear PC’s cache manually or with the help of the best system optimizer software.
There are different ways to clean cache on a Windows computer depending on the rights and usage. We should clear the system cache, user cache, browser cache and other temporary internet files from our device. Here in this article, we have simplified the process of how to clear Windows cache.
Table of Contents
Clean Temp Files and Prefetch
Temporary files and cache can take up a lot of space on your device. You can clear cache in Windows by giving a few commands.
- Step 1. Press Window key with R to open the Run command prompt. Type Temp and press the Enter key. Confirm if prompted and it will open Windows Explorer with all the Windows Temp Files.
- Step 2. Select all the files (Ctrl + A) and delete them by pressing the (Shift + Delete) key.
- Step 3. Press (Win + R) to open the Run command prompt. Type %Temp% and press the Enter key. Confirm if prompted and it will open Windows Explorer with all the User Temp Files.
- Step 4. Select all the files (Ctrl + A) and delete them by pressing the (Shift + Delete) key.
- Step 5. Press (Win + R) to open the Run command prompt. Type Prefetch and press the Enter key. Confirm if prompted and it will open Windows Explorer with all the Memory Management Files.
- Step 6. Select all the files (Ctrl + A) and delete them by pressing the (Shift + Delete) key.
Clear Browser Cache
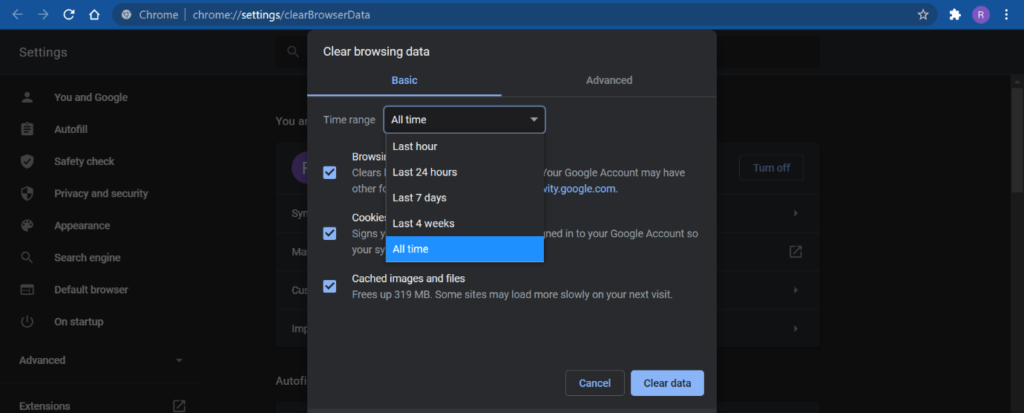
Whenever we open a website or browse through social media, it accumulates a lot of temporary files, cache and cookies. The easiest way to clean cache, cookies and browser temp files is through these steps.

- Step 1. Go to your browser and press (Ctrl + Shift + Del) keys to open the browser settings window.
- Step 2. Under the time range, select ‘All Time’ or Everything. Ensure that you put a check on the ‘Cached Images & Files’ option.
- Step 3. Click on the ‘Clear Data’ button and all the temp files and browsing history will be deleted.
Perform Disk Cleanup
Disk Cleanup is one of the best Windows utilities to clear cache in Windows. It is an all-in-one tool to clean the system cache, user cache, and all other temp files from different hard drive partitions.
- Step 1. Press (Window with + R) to open the Run command prompt. Type CLEANMGR and press the Enter key. This command will open the Disk Cleanup Utility to select the Hard Drive partition you wish to clean.
- Step 2. Select C: Drive first and once done, follow the same steps on all the drive partitions.
- Step 3. Once you click on the Okay button, the Disk Cleanup utility will start scanning and list out all the removable clutter.

- Step 4. Put a check on all the found clutter. If there is nothing important in your downloads folder, select that too. Click on the Okay button to clear the user cache on the computer.

- Step 5. Follow steps 1 to 4 and come back to the same screen. Click on the ‘Clean Up System Files’ button at the bottom to clean the system cache on Windows.
- Step 6. Select all the files listed on the C: Drive and click on the Okay button. This is how to clear Windows cache with a one-stop solution. Perform the same steps on other Hard Drive partitions and restart the computer once done.
Clear Windows Store Cache Files
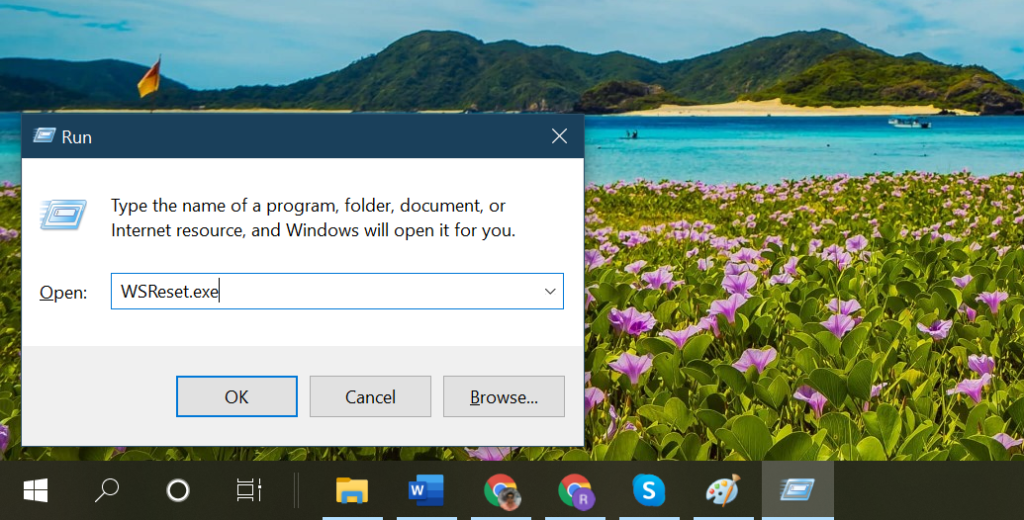
Windows store also accumulates a lot of cache and user data based on interests, download history and other activities on the Windows Store. You just need to give one command to clear Windows Store cache files.

- Step 1. Press (Win + R) to open the Run command prompt.
- Step 2. Type WSReset.exe and hit the Enter key. All the Windows Store Cache will be removed.
Clear DNS Cache Files
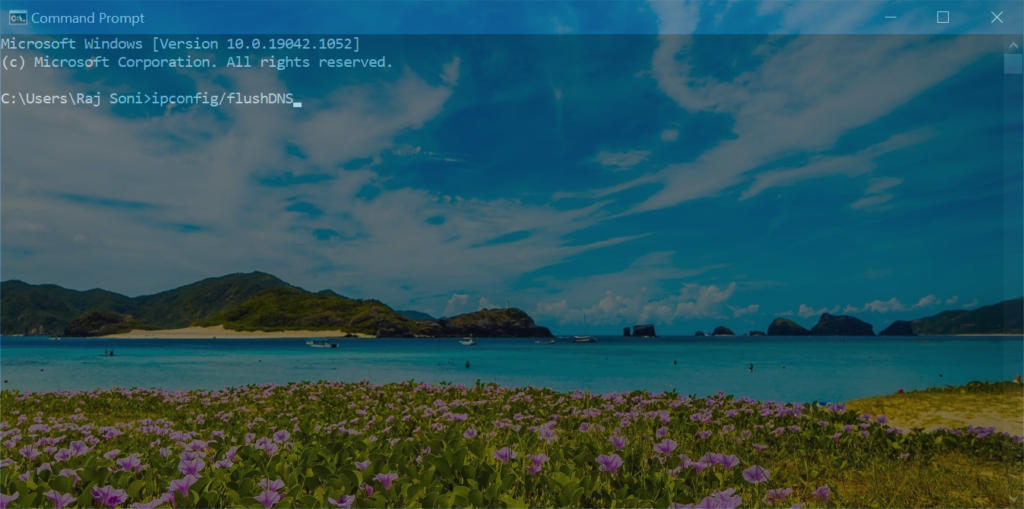
DNS Cache, also known as Domain Name Server cache files are collections of temporary databases created by the network system. It maintains a record of all the website visits and attempts to connect to other domain systems.

- Step 1. Press the Start button, type CMD and hit the Enter key to open the command prompt.
- Step 2. Type ipconfig/flushDNS and hit the Enter key. This will clear your DNS Cache files.
Use Advanced System Optimizer
Cache files and temporary files are stored on other folders of Windows. All the apps that are installed on the computer also create cache and cookies with every update. We can’t dig out all these files manually! Here comes the need for the Best System Optimizer to automatically clear cache in Windows operating system. This is one of the easiest ways to clean cache files and keep your system performing at its peak!
Advanced System Optimizer
Advanced System Optimizer is one of the best System optimization software to take overall good care of your PC and keep it clean. It is a one-stop solution to optimize all the components of the computer and offer you the best performance. You can clean system cache, clean user cache, perform optimization, remove cookies, temp files, perform browser optimization and cleaning.

You can also perform registry optimization, enhance system privacy & security, perform disk optimization, add encryption to files and folders, perform Backup and Restore, securely delete files, and optimize Windows 10 for the best gaming experience. It is compatible with Windows 10/8.1/8/7/Vista and XP (both 32-bit and 64-bit) versions to optimize system memory, RAM, Hard Drive and enhance PC performance.
Summing Up
Regular cleanup and maintenance are important to experience the outstanding performance of your computer. It is necessary that you regularly clear the cache in Windows. There are different ways to clean cache files that will help you optimize the computer memory however if you don’t know how to clear Windows cache from all the utilities, make use of one of the Best System Optimization Software. Keep it Clean, Happy Computing!
Also read about: Quick and Easy Tips for Cleaning up Your Mac