This article emphasises how to import Public Folder PST to Office365. If you’re also looking for a way to move your public folder PST to Office 365, this article can help you complete your task. It provides you with both manual and automated methods. It’s up to you to select the approach that fits you best. Let us proceed with both techniques with complete details.
Import Public Folder PST to Office365 Using AzCopy
To use this method, you must be extremely technically knowledgeable. Additionally, this process contains several stages. We will describe each and every step in detail. There are additional, more detailed steps for each stage.
To do this method, first, you need to manage the admin roles, then copy the SAS and download the AzCopy. Next, upload the PST file. Lastly, create a PST file to start the migration task. Let’s go over each step in more detail.
#1. Manage the ADMIN Role Page to Import Public Folder PST to Office365
- Log in to Office 365.
- Go to the admin portal.
- Head over to the Exchange Admin Centre.
- Select the Role option, then Admin Roles.
- After that, a panel on your right hand will appear; select the Import/Export box from there.
- Now, click on the Mailbox Import/ Export role group on the Admin roles page.

Then a new wizard will appear asking you to add or delete admins from the role groups. Take the next step to import PST to public folder Office 365.
Learn More: How to Export Emails from Office 365 to PST Outlook?
#2. Copy the SAS URL and download Azcopy to import PST public folder to Office365
- Go to the Compliance section.
- Following, head over to the Data Lifecycle Management Section.
- Then select the Import section.
- Click on the New Import Job under the Import tab.

- Type a name for the import job. (Note: use lowercase, numbers, etc. Don’t use uppercase characters and spaces.)

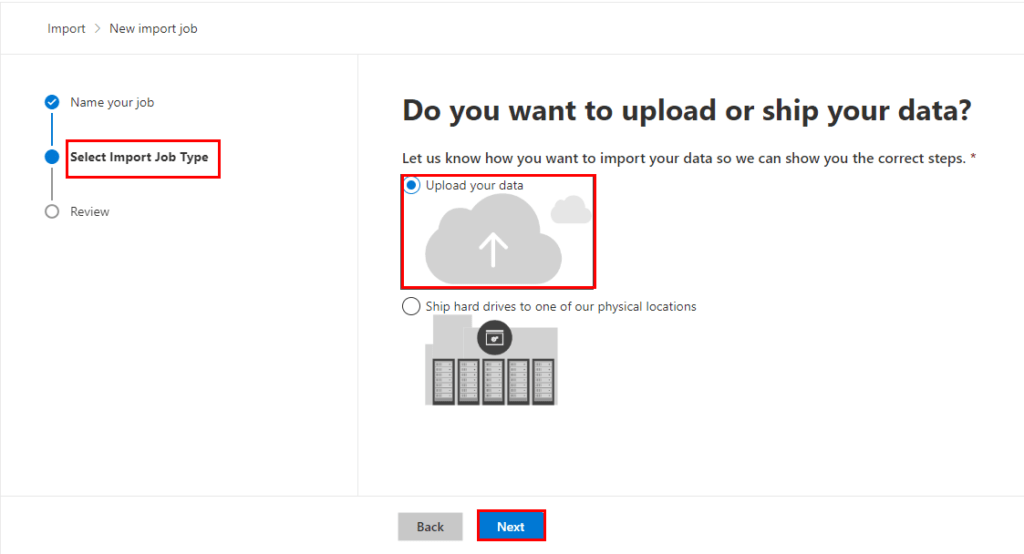
- The next panel asks you, “Do you want to upload your data or ship your data?”
- Choose Upload your data option.
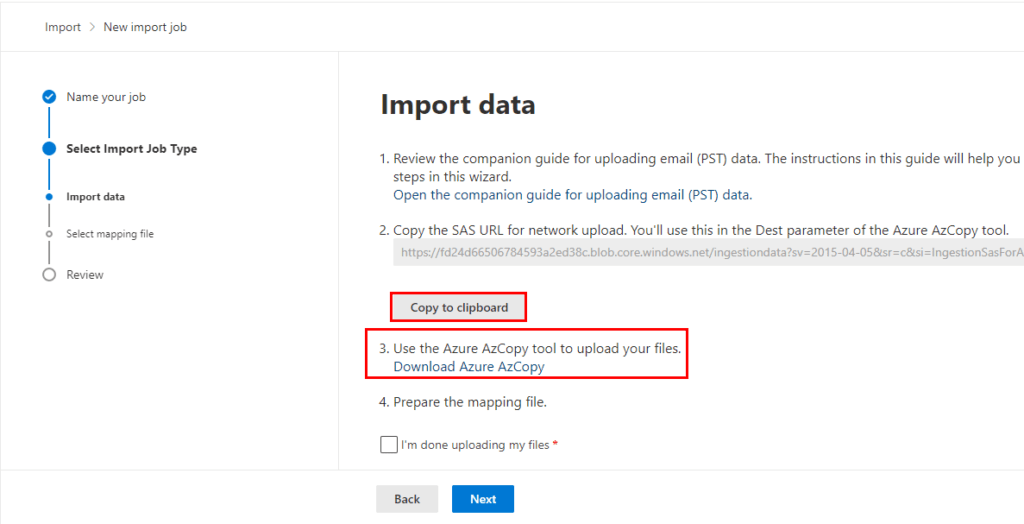
- In the subsequent Import Wizard, copy the SAS URL for network upload.

- Use the Azure AzCopy Tool to upload your file and tap Next.

#3. Upload PST File to Office 365
Now your AzCopy is ready to upload. This tool is used in Office365 import public folders from PST.
- Open the Command Prompt.
- Go to the directory where you’ve saved the AzCopy file.
- Run the following command
azcopy.exe copy “<Source location of PST file>” “<SAS URL>”
#4. Create a PST Import Mapping File to import PST to Office 365
After uploading, AzCopy creates a PST file.
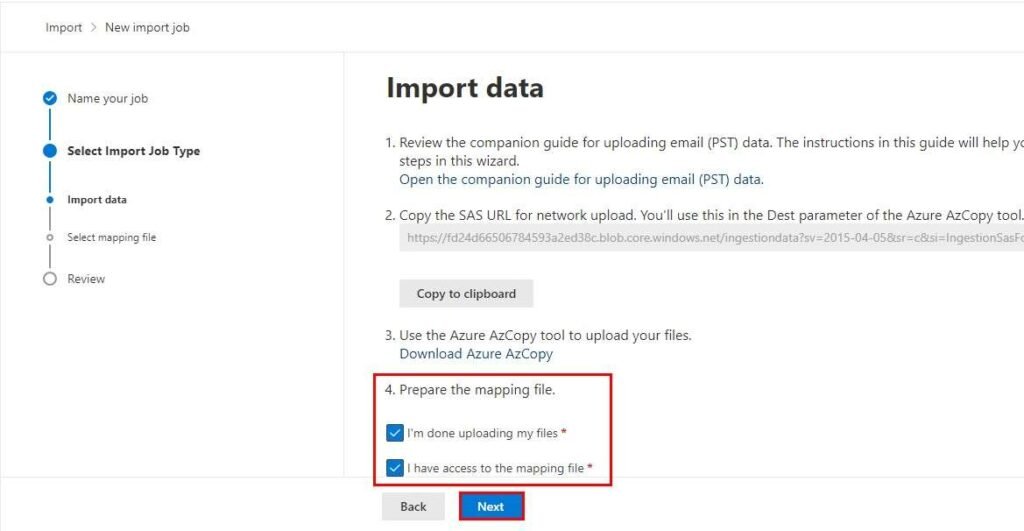
- Check both conditions to prepare the mapping files.

- Select the CSV mapping file.
- Tap the Validate button. This will check the file columns. It will display some rows with an invalid format if your file is not up to par.
- Finally, tap the Next button.

#5. Start the PST Migration to Import Public Folder PST to Office365
- Go to the Exchange Import Data page.
- After validating the CSV file perfectly, save it.
- You have finally created the import job successfully.
- A new import job will appear on the screen. Click “Import to Office 365.”
- Manage the filters to move further and tap the Next button.
- Click on the Import Data.
- Finally, you’ve completed the task to Import Public Folder PST to Office365.
Finally, after finishing these tasks, inhale deeply. This method is too lengthy and full of complexity. Unless you have perfect and highly technical expertise, you can not use the method. In this situation, we advise you to look for a substitute that will make your task easier. You can use PST Converter to Import Public Folder PST to Office365. This utility can reduce your efforts. Let us learn more about the utility.
Upload PST to Office 365 Without Outlook
Outlook PST Migrator Tool is among the best tools for importing PST files into Office 365, Gmail, Hostgator, IMAP, iCloud, AOL, Outlook Web Application, and others. Additionally, it also converts your PST into several file formats like PST(itself), PDF, MBOX, HTML, MHTML, etc. This utility does not involve complex steps, and you can use this software as instructed.
Steps to Import Public Folder PST to Office365
- Download and install the Outlook PST Migrator Tool and run it as an administrator.
- Add the PST file and check the folders that you want to back up. Press Next.
- Select the email client as Office 365 and enter the required credentials.
- Manage the utility features as per your requirements.
- Assign a Name and Destination for the output folder.
- At last, click on the Convert button to import PST public folder to Office 365.
Conclusion
In this write-up, we have covered the detailed steps to import Public Folder PST to Office365 manually and professionally. The manual approach is full of complexity and requires technical expertise. On the contrary, using the professional tool can simplify your task of migration and allows you to import PST to public folder Office 365.
Read more: 8 Tips to Build an Email List for Affiliate Marketing
