With the launch of the Windows 11 operating system, many windows 10 users updated to the Windows 11 operating system on unsupported devices. Owing to the compatibility issues, users faced issues like freezing and nagging. While Windows 11 operating system is more advanced, highly productive, and fast, these common issues were some that hampered the overall experience.
Below is the list of some quick and easy hacks to increase windows 11 PC performance. let’s start reading them one by one and learn how to improve performance and on Windows 11 and optimize system memory and manage system cache in Windows 11.
Table of Contents
1. Disable Startup Apps:
Startup apps are those apps that automatically run in the background during the system boot-up. While many of them are system files, essential for a system startup, most of them are third-party apps that are set to run in the background.
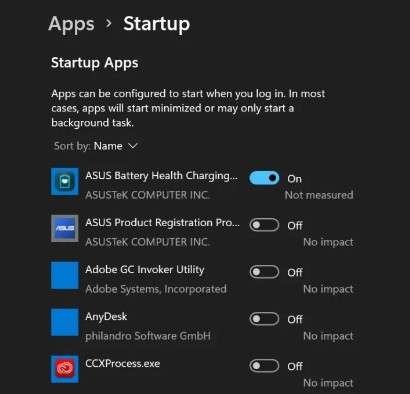
These app apps simply run in the background, hampering the startup time of a Windows 11 PC. And hence, by simply disabling these apps one can easily tweak Windows 11 performance. To do so.
- Navigate to the computer Settings. From the left panel click on Apps. Under the right panels, scroll down and click on startup.
- The startup window displays all the applications installed. Toggle off the applications that you do not want to automatically start at the Windows startup.

2. Turn Off App Notifications:
Getting notifications of different apps is a good thing. However, when these notifications keep popping up now and then they result in a sluggish and slow performing PC. Thankfully, with Windows 11, one can now turn off the notifications. To do so.
- Navigate to the computer Settings, here click on the System tab and then click on Notifications
- Under the heading “notifications from apps and other senders”, you will find a list of all the applications that are set to send notifications.
- Simply toggle off the applications you do not want notifications from this.

Not only saves us from frequent notification popups but also improves the Windows 11 performance.
Some other manual methods to improve Windows 11 performance are disabling the visual effects, switching to the Power Performance Plan, uninstalling unwanted applications, keeping the PC safe from spyware infections, etc.
A better way to optimize memory and manage system cache in Windows 11 is to use a third-party optimization tool that can perform optimization tweaks on your system, thereby increasing its overall speed and performance.
One such multi-utility application is Advanced System Optimizer from Systweak Software. It is a user-friendly utility that has an easy interface and does not require much technical knowledge.
Advanced System Optimizer:
Advanced System Optimizer is a system tweaking utility that can easily enhance and improves the performance of your system. It includes 25+ tools to improve and tweak your PC’s performance. With it, one can easily, remove unwanted apps keeps PC safe from spyware/malware infections, optimize memory and system cache, optimize registry and disks, etc.
Let’s see how to easily optimize memory and manage the system cache using Advanced System Optimizer. To do so:
- Download Advanced System Optimizer from the official website of Systweak Software.
- Once downloaded, follow the onscreen instructions to install the app and then open the app.
- Register it with the key that you may have received after purchasing the application.
- Once the program has been registered, click on the Windows Optimizer tab from the left panel.
- Post this click on Memory Optimizer from the right panel.

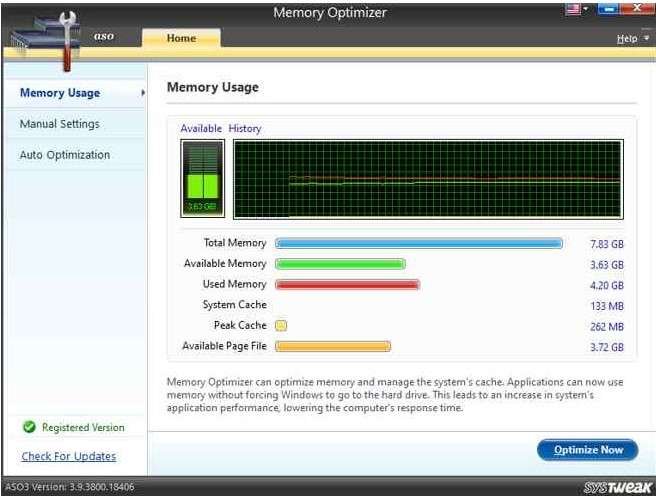
- The Memory Optimizer window shows how the memory and cache are being used on your Windows PC.
- Simply click on the Optimize now button.

- Doing so will retrieve or reinstate the memory that was occupied unnecessarily thereby increasing the overall performance.
Rather than managing the memory and cache of a Windows 11 PC, Advanced System Optimizer also serves various purposes and has multiple benefits, which are listed below.
- It cleans invalid registry entries using the registry cleaner.
- Keeps a check on all kinds of malware spyware infections and removes them with its module named System Protector.
- The junk file cleaner aims at cleaning all the junk files retrieving precious disk space.
- Memory Optimizer to optimize the memory and enhance the overall performance.
- It also lets you view the System Information.
- The Safe Uninstaller enables a user to uninstall or remove applications that are of no use.
- The Duplicate File Finder module removes duplicate files and thereby optimizes the storage space.
- Secure delete lets the user deletes data securely so that no one can retrieve the deleted data.
This was easy, right!. Having a power-packed Windows 11 is the first thing any user must want. While they perform superbly well in the initial stages, with the time they all need tweaking. Read the complete article to know how to optimize memory and manage system cache in Windows 11.
Also read more: How to Recover Dropbox Storage Space by Deleting Duplicate Files